释放 AI 的力量:使用 Next.js 和 OpenAI 构建旅行规助理

本文再来介绍通过 AI 来制定旅行计划。接下来一起来来构建 AI Travel,这是一个小项目,使用 OpenAI 的 API 和 Next.js 构建的 WEB 应用。
AI Travel 是一个紧凑的概念验证 (POC),目的是展示人工智能的潜力。通过利用 OpenAI 的 API 功能,实现一个封装了简单而强大的想法的项目。
和其它主流的AI应用一样,一个简单的表单,点击 Generate,生成一份结果,即详细的旅行计划,表单应该包含了语言、货币和旅行指南等方面的信息,对于旅程直观的地理位置是很关键的,因此项目还将使用 Leaflet 集成地图来显示旅程的每个阶段。
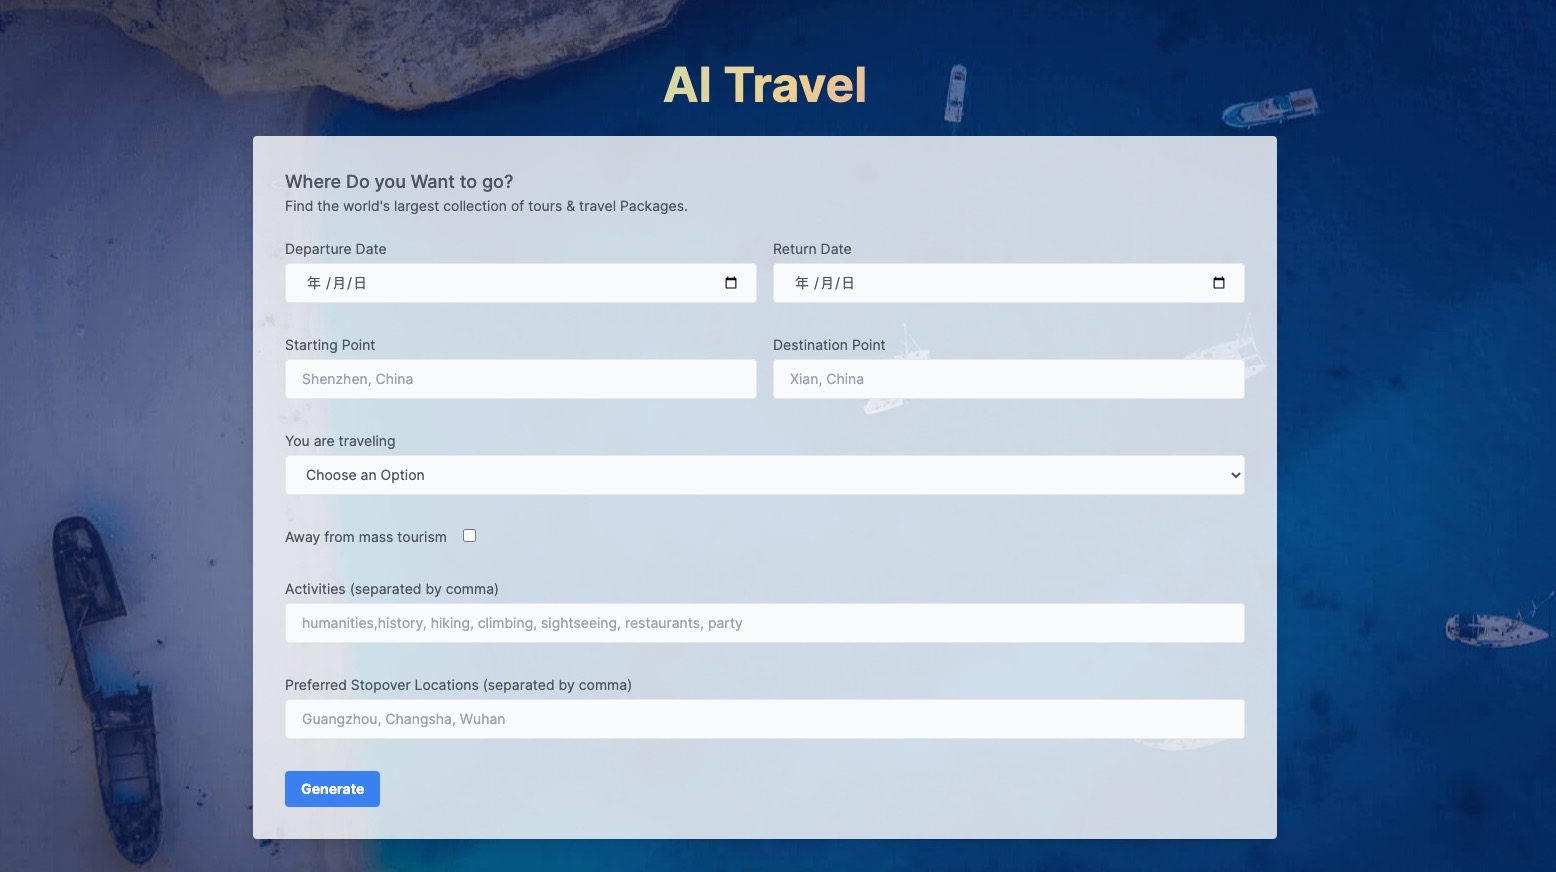
由于是紧凑的概念验证 (POC) 项目,先来简单设计一下表单信息:
- 出发日期
Departure Date - 返程日期
Return Date - 出发地
Starting Point - 目的地
Destination Point - 旅行情况(单人、情侣或团体)
You are traveling (Solo, Couple, or Group) - 避免大众旅游景点的复选框
Away from mass tourism - 旅行期间所需的活动(可选)
Activities - 首选中途停留地点(可选)
Preferred Stopover Locations
这些字段将在定制提示以生成量身定制的、针对个人的旅行计划方面发挥关键作用。
生成的旅行计划结果如下:
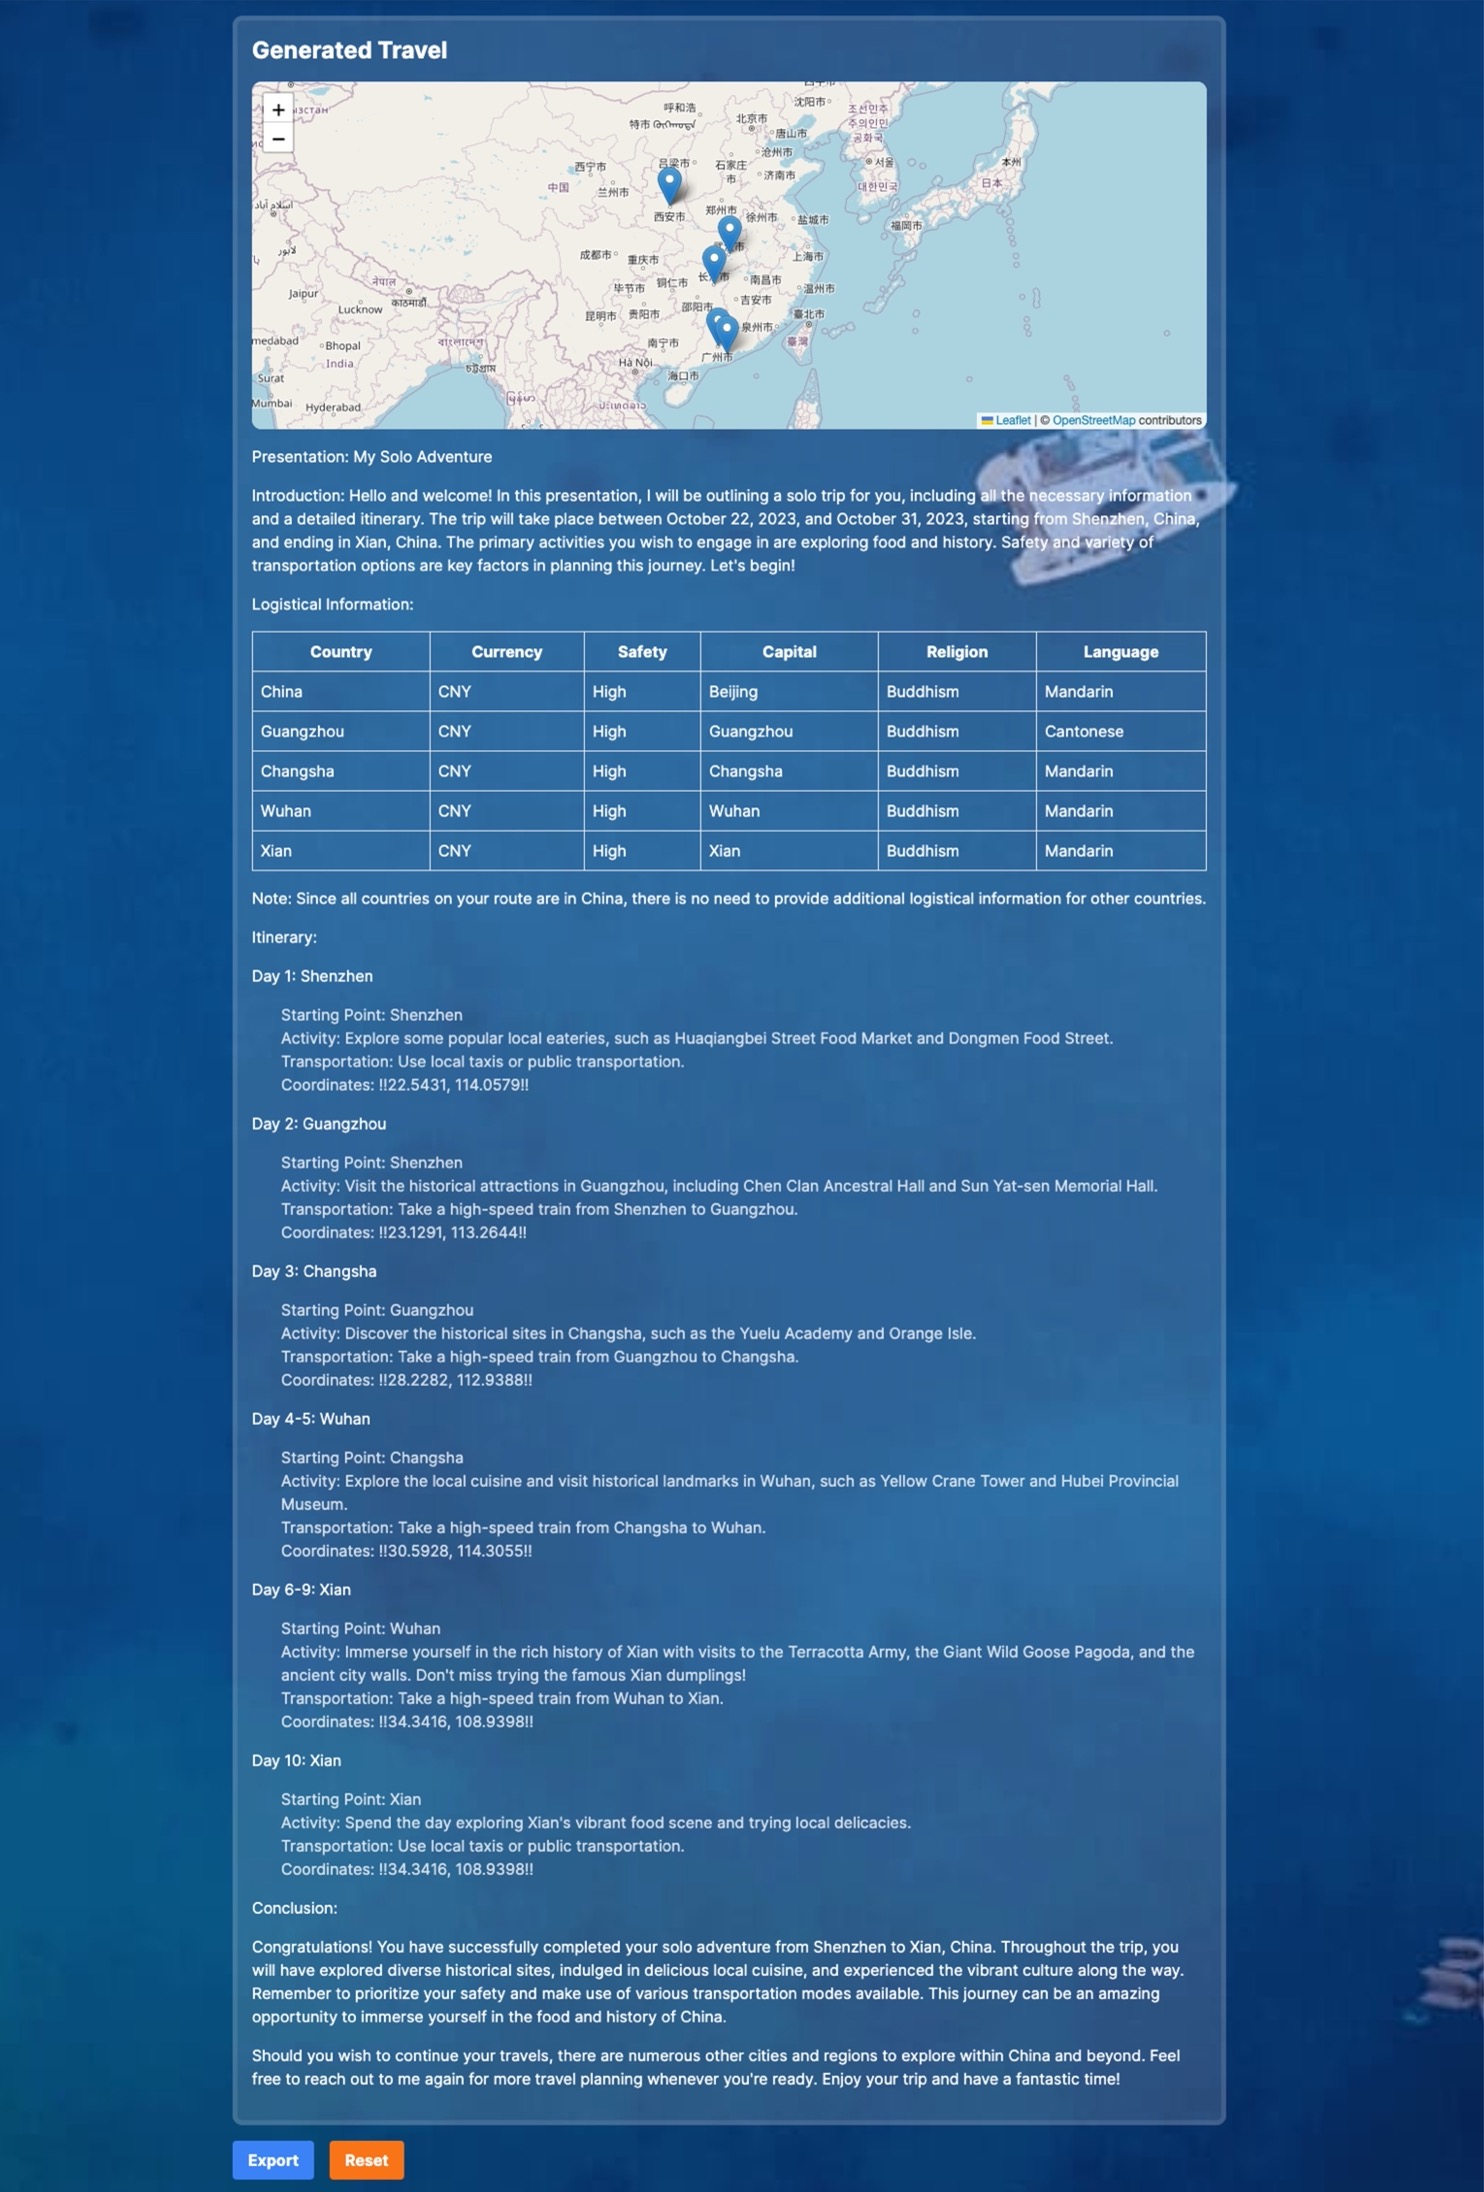
提交表单后,应用程序将生成一个响应结果,提供详细的个性化旅行计划。响应结果将包括:
- 由 Leaflet 提供支持的地图,显示每个建议旅行阶段的标记。
- 表格中包含根据旅行计划量身定制的便捷信息,例如主要语言、货币等等。
- 旅行指南,提供根据用户喜好定制的路线,建议活动,并就可持续旅游选择提供建议。
- 在底部将有
Export 导出的按钮允许用户以.txt格式导出人工智能生成的旅行计划。
定义 Prompt
利用 OpenAI 的 API 的强大功能的一个关键部分是能够创建有效的提示 prompt。提示 prompt 充当 AI 模型的路线图,指导其生成所需的输出。提示越具体、越详细,人工智能模型就能更好地解释请求并生成合适的响应。在这里,目标是制定一个复杂但高度个性化的旅行计划。因此,提示需要详细且结构良好。
在本文中模版提示如下所示:
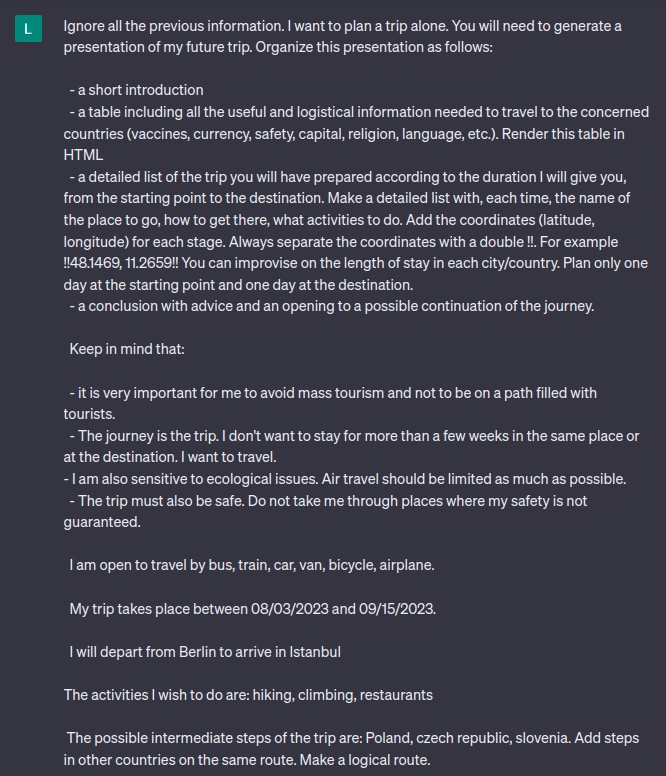
请注意提示的格式,专门用一系列清晰、详细的说明构建了提示,以确保人工智能理解确切要求。
还给出希望避免大规模旅游,优先考虑安全,并且对各种交通方式持开放态度,明确这些 偏好 对于获得适合需求的响应至关重要。
下面分解一下提示的关键点:
- HTML 表格:在提示中,明确要求 AI 将某些信息(例如货币、安全等)呈现为 HTML 表格。OpenAI 的 GPT 能够理解并生成 HTML 代码。可以直接使用生成的输出在网页上呈现 HTML 表格。
- 坐标:询问旅程每个阶段的坐标,用双感叹号分隔
!!48.1469, 11.2659!!。使用唯一标识符!!!将使能够在以后轻松提取和处理这些坐标。然后可以将它们转换为 JavaScript 数组,使用坐标信息在 Leaflet 地图上增加标记。 - 个性化:提示的构建方式能够根据用户输入轻松自定义它。表单中的每个字段都对应于提示的一部分。例如,表单的
出发日期、到达日期、出发点、目的地、旅行情况和所需活动字段将替换提示中相应的模版占位符,这能够根据用户的喜好创建完全个性化的提示。
通过考虑到这些因素来制定提示,可以确保人工智能模型为每个用户生成详细、个性化且实用的旅行计划。
构建前端
前端虽然不会在本文详细介绍(主要重点是集成 OpenAI API),这里利用 Next.js 的强大功能和 Tailwind CSS 的便利性来创建 Travel Generator 的表单。
代码可能不是最完美的版本,因为本文优先考虑速度以快速启动并运行概念验证 (POC)。然而,它很好地满足了目的,为 AI Travel 提供了实用且用户友好的界面。
OpenAI API 密钥
本文涉及的人工智能部分需要使用 OpenAI API,关于 OpenAI API 密钥的申请这里不再介绍。
API 调用
此步骤将涵盖与 OpenAI API 交互的代码,将了解此交互的两个部分:进行调用的 API 路由以及使用此路由的处理程序。
首先,安装 OpenAI 依赖包:
npm install openai
注意,openai 依赖库只能在服务器端使用,因为在客户端浏览器代码中使用它会暴露 API 密钥,涉及安全问题。
接下来配置 API 代码:
import { Configuration, OpenAIApi } from "openai";
import { NextResponse } from "next/server"

const model = process.env.OPENAI_MODEL || 'gpt-3.5-turbo';
首先导入必要的库并将默认模型设置为 gpt-3.5-turbo。使用的实际模型将是 gpt-3.5-turbo 或使用 OPENAI_MODEL 环境变量中设置的值。
const getPrompt = ({ departure_date, return_date, starting_point, arrival_point, travel_type, ecological, mass_tourism, activities, steps }) => `
  Ignore all the previous information. I want to plan a trip ${travel_type === 'alone' ? 'alone' : `as a ${travel_type}`}. You will need to generate a presentation of my future trip. Organize this presentation as follows:

  - a short introduction
  - a table including all the useful and logistical information needed to travel to the concerned countries (currency, safety, capital, religion, language, etc.). Render this table in HTML
  - a detailed list of the trip you will have prepared according to the duration I will give you, from the starting point to the destination. Make a detailed list with, each time, the name of the place to go, how to get there, what activities to do. Add the coordinates (latitude, longitude) for each stage. Always separate the coordinates with a double !!. For example !!48.1469, 11.2659!! You can improvise on the length of stay in each city/country. Plan only one day at the starting point and one day at the destination.
  - a conclusion with advice and an opening to a possible continuation of the journey.

  Keep in mind that:

  ${mass_tourism ? '- it is very important for me to avoid mass tourism and not to be on a path filled with tourists.' : ''}
  - The journey is the trip. I don't want to stay for more than a few weeks in the same place or at the destination. I want to travel.
  ${ecological ? '- I am also sensitive to ecological and health issues. Air hotel travel should be considered whenever possible.' : ''}
  - The trip must also be safe. Do not take me through places where my safety is not guaranteed.

  I am open to travel by bus, train, car, van, bicycle, airplane.

  My trip takes place between ${departure_date} and ${return_date}.

  I will depart from ${starting_point}, to arrive in ${arrival_point}.

  ${activities?.length ? `The activities I wish to do are: ${activities}.` : ''}

  ${steps?.length ? `The possible intermediate steps of the trip are: ${steps}. Add steps in other countries on the same route. Make a logical route.` : ''}
`
getPrompt 函数将根据收集的表单数据生成提示,这些信息被填充到预定义的模版结构中,其中包含一些基于生态考虑以及是否要避免大众旅游的条件部分。
export async function POST(req, res) {
    try {
        const body = await req.json()
        const { departure_date, return_date, starting_point, arrival_point, travel_type } = body;
        if (!departure_date || !return_date || !starting_point || !arrival_point || !travel_type) {
            return NextResponse.json({ error: 'Missing parameters' })
        }

        if (!process.env.OPENAI_API_KEY) {
            return NextResponse.json({ error: 'Wrong OpenAI configuration' })
        }

        const configuration = new Configuration({
            apiKey: process.env.OPENAI_API_KEY,
        });
        const openai = new OpenAIApi(configuration);
        const question = getPrompt(body);
        const chatCompletion = await openai.createChatCompletion({
            model,
            messages: [
                {
                    role: 'system',
                    content: 'Hello, I am a ai travel agent. I will help you to prepare for your trip.'
                },
                { role: 'user', content: question },
            ],
        });
        return NextResponse.json(chatCompletion?.data?.choices?.[0]?.message)
    } catch (err) {
        return NextResponse.json({ error: err.message })
    }
};
POST 函数是 OpenAI API 调用响应的地方。首先确保 API 密钥在环境变量中可用。然后,使用配置值调用 API,使用 getPrompt 函数构造提示,并调用 API,然后响应返回客户端。
现在有了一个API端点,将在表单提交时调用它。
const handleSubmitForm = async (event: React.FormEvent) => {
        event.preventDefault();
        setLoading(true);

        const formValues = Object.keys(form).reduce((acc, key) => {
            acc[key] = form[key] ? form[key].toString() : "";
            return acc;
        }, {} as any);

        // Validation 规则
        const forbiddenWords = ["prompts", "prompt", "ignore", "sensitive", "API", "injections", "hack"];
        const requiredFields = ["arrival_point", "departure_date", "return_date", "starting_point", "travel_type"];
        const dateFields = ["departure_date", "return_date"];
        const booleanFields = ["ecological", "mass_tourism"];
        const travelTypes = ["alone", "couple", "group"];

        // 验证表单必填项是否为空或未定义
        for (const field of requiredFields) {
            if (!form[field]) {
                setLoading(false);
                alert(`${field} cannot be empty or undefined`);
                return;
            }
        }

        // 验证字段是否有超过150个字符的
        for (const key in form) {
            if (formValues[key].length > 150) {
                setLoading(false);
                alert(`The field ${key} exceeds 150 characters`);
                return;
            }
        }

        // 验证是否包含禁用词
        for (const key in form) {
            for (const word of forbiddenWords) {
                if (formValues[key].includes(word)) {
                    setLoading(false);
                    alert(`The field ${key} contains a forbidden word: ${word}`);
                    return;
                }
            }
        }

        // 验证字段 arrival_point 和 starting_point 是否为字符串
        if (typeof form.arrival_point !== "string" || typeof form.starting_point !== "string") {
            setLoading(false);
            alert(`The 'arrival_point' and 'starting_point' fields must be strings`);
            return;
        }

        // 验证字段 departure_date 和 return_date 是否为日期
        for (const field of dateFields) {
            if (!Date.parse(form[field])) {
                setLoading(false);
                alert(`The field ${field} must be a date`);
                return;
            }
        }

        for (const field of booleanFields) {
            if (typeof form[field] !== "boolean") {
                setLoading(false);
                alert(`The field ${field} must be a boolean`);
                return;
            }
        }

        if (!travelTypes.includes(form.travel_type)) {
            setLoading(false);
            alert(`The 'travel_type' field must be 'Alone', 'Couple' or 'Group'`);
            return;
        }

        try {
            if (typeof window !== "undefined") {
                const response = await window.fetch("/api/openai", {
                    method: "POST",
                    headers: new Headers({ "Content-type": "application/json" }),
                    body: JSON.stringify(formValues),
                });
                const result = await response.json();
                if (!response.ok) {
                    alert(result.error);
                    return;
                }
                setGptResponse(result.content);
            }
        } catch (err) {
            alert(err.message);
        }
        setLoading(false);
    };
显示 API 响应
从 API 获取响应后,将以 markdown 存储在状态变量 gptResponse 中。为了在应用程序中显示它,需要将 markdown 转换为 JSX。可以使用 markdown-to-jsx 依赖包进行转换。
常规操作,使用 npm install markdown-to-jsx 安装软件包。然后,将其导入到要使用它的文件中:
import Markdown from "markdown-to-jsx";
然后,可以在渲染方法中使用 Markdown 组件,组件将 Markdown 文本转换为 JSX:
<Markdown>{gptResponse}</Markdown>
此时,应用程序可以将 GPT 模型的响应中的 markdown 转换为 JSX 并将其显示给用户。还可以将 CSS 样式应用到此输出,因为它现在是 HTML 格式。
可以根据需要自定义这些样式,这样能够在视觉上吸引用户的方式显示 API 响应。完成此步骤后,AI-Travel 主要的功能已经完成了,使用 GPT 生成行程计划、验证用户输入以防止提示注入、进行 API 调用并以用户友好的格式显示响应。

行程导出
这是一个很棒的功能,允许用户将生成的旅行计划保存为文本文件格式以供在行程中参考。
为了实现这一点,可以创建一个函数 exportInTextFile。该函数使用 gptResponse 的内容创建一个新的文本 Blob,然后将其转换为 URL 并用于创建新的锚元素:
    const exportInTextFile = (e: React.MouseEvent<HTMLButtonElement>) => {
        e.preventDefault();
        const element = document.createElement("a");
        const file = new Blob([gptResponse], { type: "text/plain" });
        element.href = URL.createObjectURL(file);
        element.download = "travel-tour.txt";
        document.body.appendChild(element);
        element.click();
    };
单击导出按钮时会触发此功能:
<button className="bg-blue-500 hover:bg-blue-700 text-white font-bold py-2 px-4 rounded mr-4" onClick={(e) => exportInTextFile(e)}> Export </button>
这样用户可以通过单击导出按钮将旅行计划下载为文本文件。
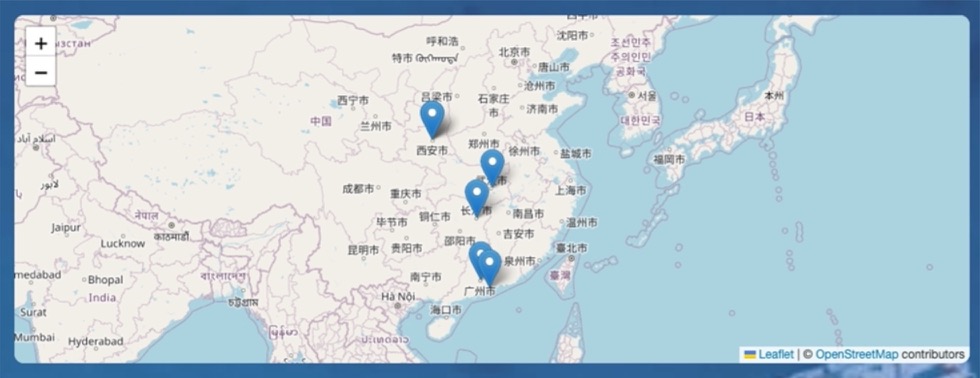
增加地图
旅行行程生成器的显着增强之一是能够在地图上可视化旅程。这种视觉表示可以帮助用户了解其旅行的地理布局,提供距离和位置感。
虽然 Google 地图是一种流行的地图选择,但 Leaflet 是一个功能强大的开源 JavaScript 库,用于适合移动设备的交互式地图。它轻巧、简单,并且有许多可用的插件。与 Google 地图不同,Leaflet 是免费的,不需要 API 密钥,这使其成为更具成本效益的选择,特别是对于小型或个人项目。
实现此功能的第一步是从生成的响应中提取坐标,假设该坐标以 !!纬度,经度!! 的格式表示。
使用正则表达式来提取坐标,将它们解析为可以在地图上绘制的点数组。
useEffect(() => {
  if (!gptResponse?.length) return;
  const pattern = /!!(.*?)!!/g;
  const matches = gptResponse.match(pattern);
  if (matches) {
    setLeafletPoints(
      matches.map((match) => {
        let coords = match
          .replace(/!!/g, "")
          .split(",")
          .map((coord) => parseFloat(coord.trim()));
        return coords;
      })
    );
  }
}, [gptResponse]);
接下来,使用 Leaflet 的 React 库 react-leaflet 构建一个地图组件 MapComponent.tsx。
npm install leaflet react-leaflet
然后,由于使用带有应用程序路由设置的 Next.js 13,其中组件默认在服务器端渲染,需要动态导入 react-leaflet 组件以避免与服务器上缺少 window 对象相关的问题。
import dynamic from "next/dynamic";
const MapContainer = dynamic(() => import("react-leaflet").then((module) => module.MapContainer), { ssr: false });
const TileLayer = dynamic(() => import("react-leaflet").then((module) => module.TileLayer), { ssr: false });
const Marker = dynamic(() => import("react-leaflet").then((module) => module.Marker), { ssr: false });
const Popup = dynamic(() => import("react-leaflet").then((module) => module.Popup), { ssr: false });
在 MapComponent 中,创建一个 MapContainer 并在其中放置一个 TileLayer 以用于实际的地图图像。然后,将从 gptResponse 中提取的每个点绘制为地图上的 Marker。
最后,通过将 leafletPoints 作为 prop 传递给它来将该组件包含在应用程序中:
<MapComponent points={leafletPoints} />
现在,用户可以在地图上直观地看到行程,从而增强了应用程序的用户体验。
总结
到这里又学习了一种使用 OpenAI 的 GPT 和 Next.js 创建交互式智能旅行行程规划助理。